
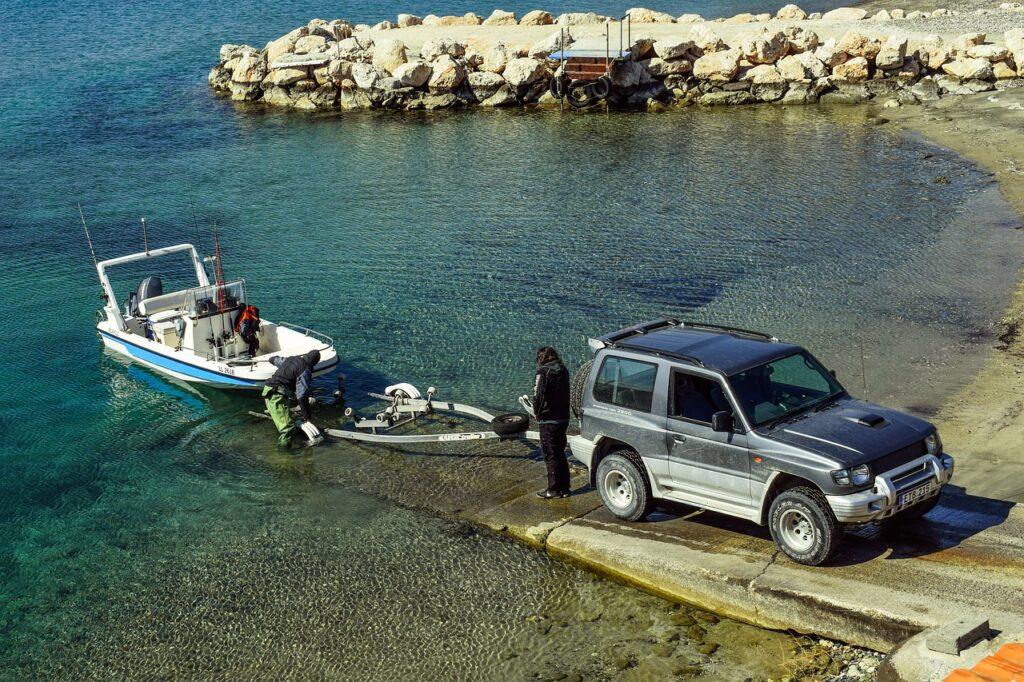
How to Make Boat Trailer Guides
Are you tired of struggling to align your boat trailer when launching or loading your boat? Then look no further! In this article, we will show you how to make your own boat trailer guides.
With just a few tools and materials, you can easily create guides that will make the process a breeze. Say goodbye to frustration and hello to smooth sailing with your new custom-made boat trailer guides.
Key Takeaways:
- The tools and materials needed for making boat trailer guides include a tape measure, pencil, hacksaw, safety goggles, drill, and drill bits.
- Measuring and marking accurately is essential, including measuring the height and width of the boat trailer, marking the center point and halfway point on each PVC pipe.
- Cutting and shaping the PVC pipes should be done precisely according to the measurements, and the PVC can be heated to make it pliable for shaping.
- Attaching the guides to the trailer involves positioning them evenly and aligned with the boat’s hull, marking and drilling mounting holes on the trailer frame, and securing the guides tightly with screws or bolts.
Tools and Materials Needed
To make boat trailer guides, you’ll need a few tools and materials. The first thing you’ll need is a tape measure to ensure precise measurements. Freedom seekers like yourself appreciate accuracy, so take your time with this step.
Next, grab a pencil to mark the measurements on the PVC pipes. You’ll also need a hacksaw to cut the pipes to the desired length. Don’t forget to wear safety goggles to protect your eyes while cutting.
Once the pipes are cut, you’ll need a drill and drill bits to make holes for the mounting brackets. This step may require some muscle, but freedom-seekers aren’t afraid of hard work. After drilling the holes, grab a screwdriver to attach the brackets securely. You’ll also need screws or bolts and nuts to fasten everything together.
Gather some PVC cement to join the pipes and connectors. Apply a liberal amount to ensure a strong bond. Once the cement is dry, you’re ready to attach the guides to your boat trailer.
Check Youtube video we have found on this topic:
With these tools and materials, you’ll be well-equipped to make boat trailer guides that will provide the freedom and confidence you desire on your boating adventures.
Measuring and Marking
Now, grab your tape measure and pencil to accurately measure and mark the PVC pipes for your boat trailer guides. Measuring and marking are crucial steps in ensuring that your boat trailer guides are the perfect fit for your needs.
Start by measuring the height of your boat trailer, from the ground to the top of the boat. This measurement will determine the length of your PVC pipes. Use your tape measure to get an accurate reading and jot down the measurement with your pencil.
Measure the width of your boat trailer. This measurement will determine the distance between the PVC pipes. Again, use your tape measure to get an accurate reading and mark it on the PVC pipes.
To ensure that the PVC pipes are aligned properly, mark the center point on each pipe. Measure and mark the halfway point of each pipe’s length. This will help you position the pipes evenly and symmetrically on your boat trailer.
Take your time with the measurements and markings, as precision is key to a successful project. Double-check your measurements before moving on to the next step.
Once you have finished measuring and marking, you’re ready to move on to the next stage of constructing your boat trailer guides.
Cutting and Shaping the Guides
You will need a saw to cut the PVC pipes and shape them according to your measurements. Once you have measured and marked the pipes, it’s time to start cutting and shaping them. Take your saw and carefully cut the pipes according to the measurements you made earlier. Make sure to follow the markings precisely to ensure accuracy. Once the pipes are cut, you can start shaping them. This can be done by using a heat gun or a torch to soften the PVC. Once the PVC becomes pliable, you can shape it according to the desired design. For example, if you want the guides to have a curved shape, you can gently bend the heated PVC into the desired curve. Use caution when working with heat and always wear protective gloves.
To help you visualize the process, here is a table summarizing the steps for cutting and shaping the boat trailer guides:
| Steps for Cutting and Shaping |
|---|
| 1. Measure and mark the PVC pipes according to your desired length. |
| 2. Use a saw to cut the pipes along the marked lines. |
| 3. Heat the PVC using a heat gun or torch until it becomes pliable. |
| 4. Shape the heated PVC according to your desired design. |
| 5. Allow the PVC to cool and harden before further assembly. |
Gather the Right Materials
The first step to making your own boat trailer guides is to gather the necessary supplies. You’ll need a set of metal poles or tubes, some foam padding, some screws and bolts, and a drill. The metal poles should be strong enough to support the weight of your boat and trailer.
- PVC Pipes: PVC pipes are commonly used for boat trailer guides due to their durability and affordability. Choose PVC pipes with a diameter and length suitable for your trailer’s needs.
- PVC Connectors: You will need various PVC connectors, such as T‑connectors, elbow connectors, and couplers, to join the PVC pipes together and create the desired shape and structure for the guides.
- PVC Cement: PVC cement is used to securely bond the PVC pipes and connectors together, ensuring a strong and reliable construction.
- Measuring Tape: A measuring tape is essential for accurately measuring and marking the dimensions of the PVC pipes to ensure the proper fit and alignment of the guides on your trailer.
- Saw or PVC Cutter: A saw or PVC cutter is required to cut the PVC pipes to the desired lengths and angles, depending on the design and configuration of the trailer guides.
- Drill and Screws: If you plan to attach the guides to your boat trailer, you may need a drill and screws to secure the guides in place. The type and size of screws will depend on the material of your trailer frame.
- Sandpaper: Sandpaper can be used to smooth any rough edges or burrs on the cut ends of the PVC pipes, ensuring a clean and polished finish.
- Safety Equipment: It’s important to prioritize safety when working with tools and materials. Wear safety goggles, gloves, and other protective gear as necessary to protect yourself during the construction process.
The foam padding will help to protect your boat and trailer from any bumps or jolts during transport.
PVC Pipe
PVC pipe is the most common material used for boat pontoon trailer guides. You will need enough PVC pipe to reach the length of your boat. PVC pipe is available in a variety of sizes, so make sure to measure your boat before purchasing the pipe.
PVC Fittings
PVC fittings are used to attach the PVC pipe to the trailer. PVC fittings come in a variety of sizes and shapes, so be sure to purchase the size and shape that fits your trailer.
PVC Cement
PVC cement is used to secure the PVC fittings to the pipe. Make sure to follow the instructions on the packaging for proper use.
Drill
You will need a drill to create holes in the PVC pipe for the fittings.
Wood Screws
Wood screws are used to secure the PVC pipe to the trailer.
Measure and Cut the PVC Pipe
Once you’ve gathered your supplies, the next step is to determine the length of the poles. This will depend on the size of your boat and trailer. Make sure that the poles are long enough to reach from the trailer hitch to the bow of the boat. Measure and cut the PVC pipe to the desired length. Make sure to measure twice and cut once to ensure that the pipe is the correct length. Also check if You have good trailer winches.
Use a Mitre Saw
If you have a mitre saw, use it to cut the PVC pipe. Make sure you have a firm grip on the pipe and follow the safety instructions for the saw.
Use a Hand Saw
If you do not have a mitre saw, use a hand saw to cut the PVC pipe. Make sure you are using a sharp blade and take your time to ensure a clean cut.
Drill Holes for Fittings
Once the pipe has been cut to the desired length, use a drill to create holes for the fittings. Make sure to measure the placement of the fittings before drilling to ensure that the holes are in the right place.
Measure the Fitting Placement
Measure the placement of the fittings on the PVC pipe before drilling. Make sure to measure twice to ensure accuracy.
Drill Holes for the Fittings
Once the placement of the fittings has been determined, use a drill to create holes for the fittings. Make sure to use the correct drill bit for the size of the fittings.
Attach the Fittings
Once you’ve cut the poles to size, the next step is to attach the foam padding. This will help to protect the boat and trailer from any bumps or jolts during transport. Use screws and bolts to attach the foam padding to the poles. Once the holes have been drilled, use PVC cement to attach the fittings to the pipe. Make sure to follow the instructions on the packaging for proper use.
Use PVC Cement
PVC cement is used to secure the fittings to the PVC pipe. Make sure to use the correct type of cement for the type of pipe and fittings you are using.
Follow the Instructions on the Packaging
Follow the instructions on the PVC cement packaging for proper use. Make sure to adhere to all safety precautions.
Attach the PVC Pipe to the Trailer
Once you’ve drilled the holes, the next step is to attach the poles to the trailer. Use screws and bolts to secure the poles in place. Make sure that the poles are firmly attached to the trailer so that they won’t come loose during transport. Once the fittings have been attached to the pipe, it’s time to attach the pipe to the trailer. You will need to use wood screws to secure the pipe to the trailer.
Mark the Position of the Pipe
Before attaching the pipe to the trailer, mark the position of the pipe on the trailer. Make sure to measure twice to ensure accuracy.
Attach the Pipe with Wood Screws
Once the position of the pipe has been marked, use wood screws to secure the pipe to the trailer. Make sure to use the correct size screws for the type of trailer you are using.
Paint the PVC Pipe
To paint PVC pipe, you will need to prepare the surface by cleaning it with a degreaser or a cleaner specifically designed for plastic. Then rinse well and dry the pipe. Apply a coat of primer designed for plastic and let it dry. After that apply a coat of paint specifically designed for plastic and let it dry.
Prepare the Pipe for Painting
Before painting the pipe, make sure to clean it thoroughly. Use a damp cloth to remove any dirt and debris from the pipe.
Paint the Pipe
Once the pipe is clean, use spray paint or brush on paint to paint the pipe. Make sure to use the correct type of paint for the type of pipe you are using.
Install the Guides
To install the Guides for a boat, you will need to first purchase the appropriate model for your boat. Once you have the Guides, you will need to mount them onto the boat. This can be done by attaching the Guides directly to the boat’s hull, or by using a mounting bracket that comes with the Guides. Once mounted, you will need to connect the Guides to your boat’s electrical system. You will need to connect the Guides to your onboard GPS system in order to use them.
Attach the Guides to the Trailer
Attach the guides to the trailer using wood screws. Make sure to use the correct size screws for the type of trailer you are using.
Install the Guide Stops
Once the guides have been attached to the trailer, install the guide stops. Make sure to follow the instructions on the packaging for proper installation.
FAQs
Can I customize the size and shape of the boat trailer guides?
Yes, you can customize the size and shape of the boat trailer guides according to your specific needs. Measure your boat trailer and determine the desired height and width for the guides. Then, cut the PVC pipes to the appropriate lengths and angles to create the guides that best suit your trailer.
How do I secure the boat trailer guides to my trailer?
There are a few methods to secure the boat trailer guides to your trailer. One option is to use screws or bolts to attach the guides directly to the trailer frame. Ensure that you choose the appropriate size and type of screws or bolts that are suitable for your trailer’s construction.
Can I paint or decorate the boat trailer guides?
Yes, you can paint or decorate the boat trailer guides to match your personal preferences or to make them more visible. Use paint suitable for PVC materials and consider using reflective tape or decals to enhance visibility, especially when loading or unloading your boat in low-light conditions. Just ensure that any paint or decorations applied do not compromise the structural integrity or functionality of the guides.