How To Hook Up Water Hose To Inboard Boat Motor
Key Takeaways:
- Flushing your inboard boat motor with a water hose is crucial for its longevity and efficiency, especially after sailing in salty or muddy waters. This simple routine reduces the wear and tear on the engine and prevents overheating, thereby ensuring smooth sailing during your voyages.
- Hooking up a water hose to an inboard boat motor is a straightforward process. It involves attaching one end of the hose to the motor’s intake and the other end to a water source. Using a motor flusher or “ear muffs,” you should then run the engine at idle speed for about 10–15 minutes for a thorough flush.
- Maintaining your water hose and the boat motor’s cooling system is integral to the proper functioning of your boat. This includes checking for leaks, inspecting for wear and tear, replacing damaged or worn parts, and regularly cleaning the hoses to prevent the buildup of debris or dirt. This regular maintenance can help avoid costly repairs and unwanted breakdowns during your boating adventures.
Welcome aboard, fellow boating enthusiast! Ever wondered how you can keep your inboard motor cool and running smoothly during those hot summer voyages?
Well, the secret lies in a simple, yet vital routine: hooking up a water hose to your inboard boat motor. This process, often referred to as “flushing,” is essential in prolonging your motor’s life and maintaining its efficiency, particularly in salty or muddy waters.
Don’t sweat it though. Whether you’re a seasoned sailor or just starting out, this easy-to-follow guide will navigate you through the steps of properly hooking up that water hose to your inboard boat motor.
How To Hook Up Water Hose To Inboard Boat Motor
Let’s jump right in and get that water hose hooked up to your inboard boat motor. This crucial step keeps your engine cool, reduces wear and tear, and helps avoid overheating during those long, sun-drenched days on the water. But hey, it’s no rocket science! All you need is a bit of time, your trusty garden hose, and a motor flusher.
- Locate the intake for the boat motor.
- Attach one end of the water hose to the intake.
- Secure the connection with a hose clamp.
- Locate a water source and attach the other end of the hose.
- Turn on the water source and check for any leaks at the connection points.
- Turn on the boat motor and inspect the water flow.
You’ll need to attach the motor flusher (often called “ear muffs”) to your boat’s lower unit. Make sure it’s covering the water intakes. Take your garden hose and connect it to the motor flusher. Double-check to ensure everything is secure and tight. Turn the water on, but make sure the flow isn’t too high — we’re not putting out a fire here!
We have found Youtube video that can be also helpfull:
Now you’re ready to start your boat’s engine. Keep it at idle speed, and let the water run for around 10–15 minutes. You’re giving your engine a good, thorough flush. Turn off the engine, shut off the water, and remove the hose and flusher.
You’ve just mastered the art of hooking up a water hose to your inboard boat motor. Regularly doing this, especially after voyages in salty or muddy waters, can significantly increase the life of your motor. So give your boat the TLC it deserves, and it’ll thank you with many more adventures to come! Happy boating!

Understanding the Components
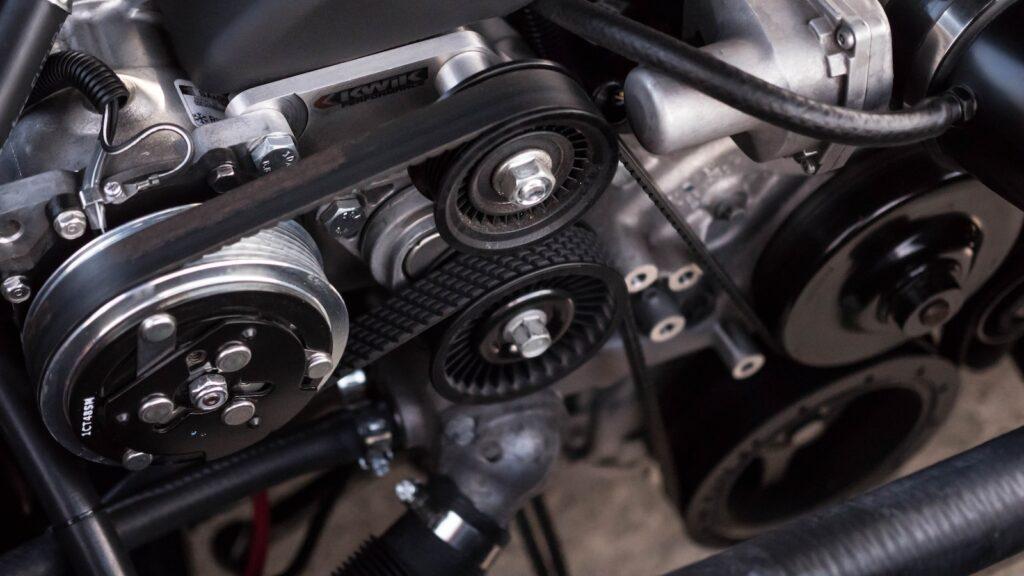
The main components of an inboard motor include the fuel pump or water washdown pump, fuel lines, exhaust manifold, and cooling system. The fuel pump is responsible for delivering fuel to the engine. The fuel lines transport the fuel from the fuel pump to the engine. The exhaust manifold directs the exhaust gases away from the engine. The cooling system is responsible for keeping the engine cool and prevents it from overheating.
How Do You Connect a Hose to a Boat Motor
To hook up the water hose to an inboard boat motor, you will need to attach the hose to the raw water pickup on the motor. This is usually located just below the water line near the stern of the boat. Once the hose is attached, secure it with a hose clamp or a similar device to make sure it is secure. You will need to open the seacock, or valve, to allow water to flow into the motor. Once the seacock is open, start the motor to begin cooling the engine.
Now You will want to check the temperature of the engine by using a thermometer. If the temperature is too high, you can adjust the flow of the water by adjusting the raw water strainer or the seacock valve. You may also need to check and replace the impeller if it has become damaged or worn out. When you are finished using the boat, make sure you turn off the seacock valve and remove the hose from the pickup to prevent water from entering the motor.
Where do you hook water to a boat motor
The water hook up for a boat motor is typically located near the lower unit. On most outboard motors, the water hook up is a small hose located near the bottom of the engine, usually on the starboard side. Make sure to use the proper fittings and clamps to ensure a secure connection
Connecting the Hose to the Water Source
So, you’re ready to connect that hose to the water source, huh? Well, it’s as simple as a summer breeze! Grab your hose and attach it to your nearest water source — typically an outdoor spigot. Remember to check the connection is snug and secure; we don’t want a water show on the dock, do we?
Now, here’s the pro tip: Before you let the water run, make sure your motor flusher (you know, the “ear muffs”) is attached and ready on your boat’s lower unit. Only then should you twist that spigot and let the H2O flow. Keep the pressure moderate – the idea is to simulate the cooling effect of the water when you’re out at sea, not to power wash your motor!
Testing the System
Once the engine is filled with water, you will need to test the system to make sure it is working properly. Start the engine and allow it to idle. If the engine runs smoothly, the water hose is correctly hooked up.
Preventing Corrosion
It is important to keep the water hose in good condition to prevent corrosion. This can be done by inspecting the hose regularly and replacing worn or damaged parts. Regularly flush the engine with fresh water to remove any debris or dirt that may have accumulated.
Securing the Hose
Once the hose is attached, you will need to secure it in place. This can be done by using clamps, hose clamps, or zip ties. It is important to make sure the hose is secure, as it will be exposed to the elements and will need to be able to withstand any waves or currents.
Maintaining the Water Hose
In order to keep the water hose functioning properly, it is important to maintain it regularly. This includes checking for leaks, inspecting the hoses for wear and tear, and replacing any parts that are damaged or worn. Keep the hoses clean and free of any debris or dirt.
Where does the water come out of an inboard outboard motor
The water from an inboard outboard motor is discharged from the lower unit of the motor, which is located beneath the waterline. This lower unit includes a water pump that circulates water around the motor to keep it cool before returning it back to the water.
Overview of Inboard Boat Motors

They are typically powered by gasoline or diesel fuel. Inboard motors are designed to provide maximum power and performance for larger boats. Inboard motors are most commonly used for fishing, skiing, and other types of recreational boating.
Inboard boat motors are an internal combustion engine that is mounted within the hull of the boat and is connected directly to the propeller shaft. They provide power to the boat’s propellers, allowing it to move through the water. Inboard motors are typically either gasoline or diesel-powered, although some are electric. They are typically more powerful than outboard motors and require more maintenance.
They come in a variety of sizes, from small engines for small boats and personal watercraft to large engines for larger boats and commercial vessels. They are also available with different features, such as reverse gears and power trim. Proper maintenance is essential for inboard boat motors to ensure their performance and safety.
How Long Can You Run an Inboard Out of Water
You can run an inboard out of water for a short period of time, but it is not recommended. Without the cooling effect of the water, the engine can overheat and be damaged. You should check the water pump and other related components to make sure they are in good working order before attempting to run the engine out of water. You should only run the engine for a few minutes at a time and allow it to cool before running it again.
Inboard boat motor cooling system
Time to dive under the hood and get to know your inboard motor’s cooling system, the unsung hero of your boat adventures!
You see, just like your car’s engine, boat motors generate heat — lots of it. Without cooling, we’re talking about a one-way ticket to Overheatingville. And trust me, that’s one destination we want to avoid. But here’s the great part – your inboard motor has its built-in chill-out mechanism: the cooling system.
Now, imagine this – your inboard motor’s cooling system is like a high-tech spa treatment for your boat’s engine. It uses water from the surrounding environment (like the lake, river, or sea you’re cruising through) to take the heat away from the engine. The raw water pump acts as the heart of this system, pumping the water into the engine block. The heat from the engine transfers to this water, which then gets expelled out, leaving the engine cool and humming nicely.
Inboard boat water hose connector
The inboard boat water hose connector is like that trusted friend who brings everyone together for a party — it’s the little piece of kit that connects your water hose to the boat engine’s cooling system.
The connector is typically made of sturdy materials (think heavy-duty plastic or brass) to withstand the pressure. This bad boy makes sure the water flows from your hose into the engine’s cooling system, playing a key role in keeping everything chilled out.
Most connectors come with an easy ‘snap-on’ feature, meaning you can connect or disconnect it faster than you can say ‘anchors aweigh!’
Outboard motor water intake
Essentially the motor’s personal water courier, the water intake’s job is to scoop up fresh water from the surrounding environment and deliver it straight to the engine’s cooling system.
Picture it like a bustling water fountain, constantly flowing to keep everything chill inside the engine. But, here’s the kicker — it does all this while your boat is cruising along, cutting through waves like a hot knife through butter!
Water hose hook up for boat motor
Let’s talk about hooking up the water hose to your boat motor – a little task with big payoffs! This connection is your lifeline when you’re working on your motor out of water, whether for a quick test run or maintenance. It’s like setting up a hydrating spa for your boat engine.
To get things started, you’re going to want a water hose connector – your ticket to creating a cool, relaxing path for water to flow right into your motor’s cooling system. Snap it onto your water hose, attach it to the motor’s water intakes, and voila! You’ve set up your own water supply for your motor.
FAQs
Why do I need to hook up a water hose to my inboard boat motor?
It’s essential when running your boat engine out of water, like during maintenance or a test run. The water hose provides the necessary cooling to prevent your engine from overheating.
What happens if I run the engine without connecting the water hose?
Without the water hose providing a continuous supply of cooling water, your engine risks overheating and causing serious damage.
Is it challenging to connect a water hose to an inboard boat motor?
Not at all! With the right connector and a basic understanding of your boat’s cooling system, you can easily set up a water hose to your motor. It’s a straightforward process and a valuable skill for any boat owner.

